Winter's coming and your heating bill's about to spike. But here's the thing — most of that warmth escapes through gaps you probably haven't noticed. Draught-proofing isn't glamorous work, yet it's one of the most effective ways to keep your home warm without blasting the thermostat.
We're talking about sealing the small spaces where cold air sneaks in. Around window frames. Under doors. Through letterboxes. These tiny gaps add up fast. In a typical Irish home, poorly sealed doors and windows account for around 15-20% of heat loss. That's significant.
The good news? You don't need a contractor. Most draught-proofing is straightforward DIY work that'll take a weekend. And the payoff comes every month when your heating bill arrives.
Where Cold Air Gets In
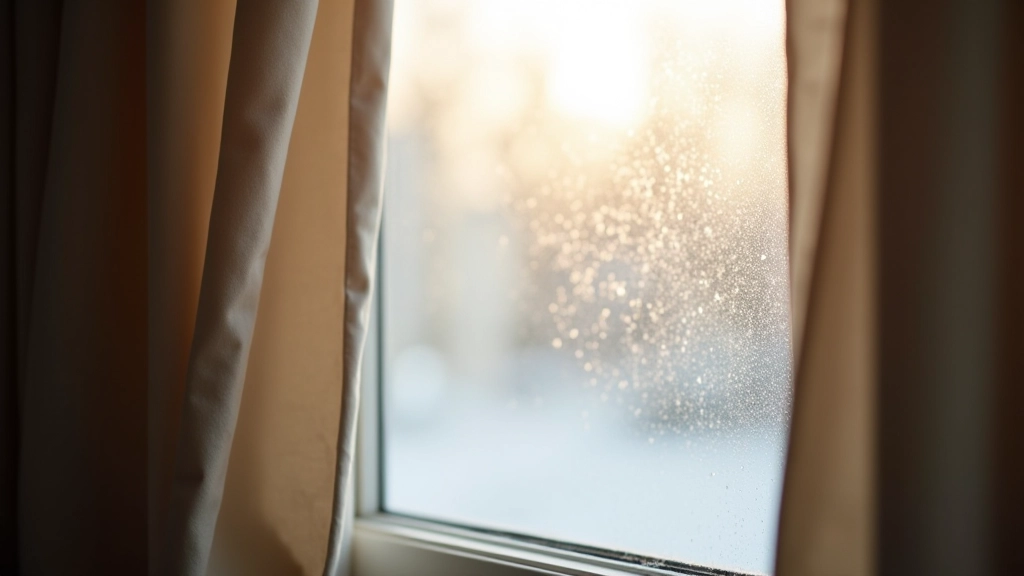
Before you start sealing things up, you need to know where the problems actually are. Walk around your home on a windy day and feel for draughts. Seriously. Put your hand near door frames, window edges, and anywhere you notice a slight breeze.
The usual suspects? Door thresholds are the biggest offender. You can actually see daylight under most doors. Window frames come second — especially older wooden ones that've warped slightly. Then there's letterboxes, keyholes, and extractor fans. Plus any gaps where pipes or cables enter your walls.
Get specific. Write down exactly where you feel draughts. This takes maybe 20 minutes and you'll know precisely what needs fixing.
Simple Fixes That Work
Door Seals & Thresholds
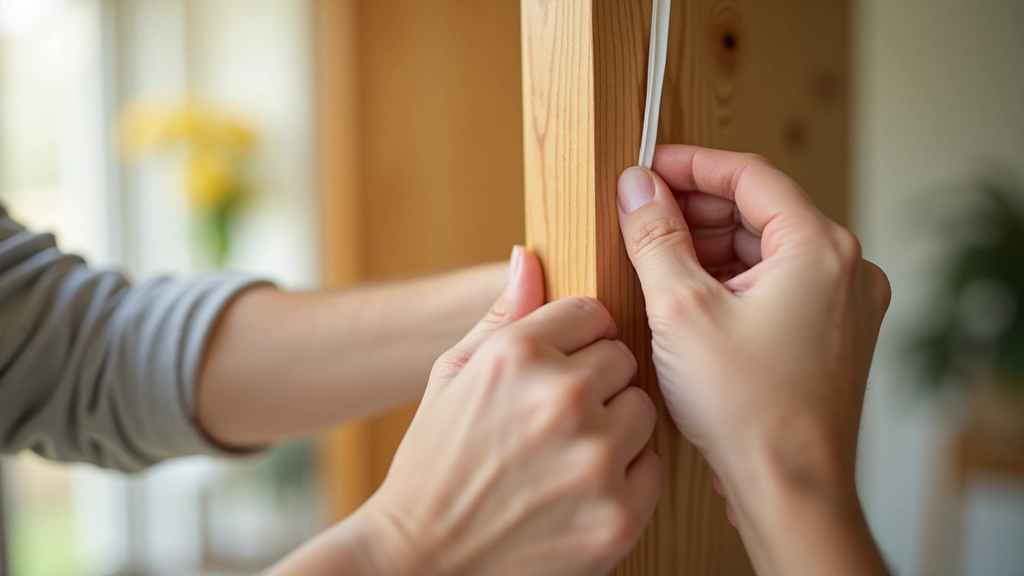
Self-adhesive foam tape is your friend here. It's cheap, doesn't require tools, and lasts about 5 years before needing replacement. Apply it around the entire frame where the door closes. For the bottom, a door sweep or threshold seal stops draughts completely.
Window Weatherstripping
Same foam tape works for windows. Go around the entire frame where it meets the wall. You'll notice the difference immediately — less noise from outside, less cold radiating from the glass. Wooden sash windows need attention at the meeting rail where top and bottom sections overlap.
Letterbox & Keyhole Covers
These tiny holes cause surprising heat loss. Install a hinged letterbox cover — they're about €10 and take five minutes. For keyholes, adhesive covers work well. Not glamorous, but you'll feel the draught stop immediately when you cover a keyhole.
Pipes & Cable Gaps
Where water pipes, electrical cables, or ventilation ducts pass through walls, there's usually a gap. Expanding foam sealant fills these perfectly. It's permanent, cheap, and you can trim excess with a knife after it dries.

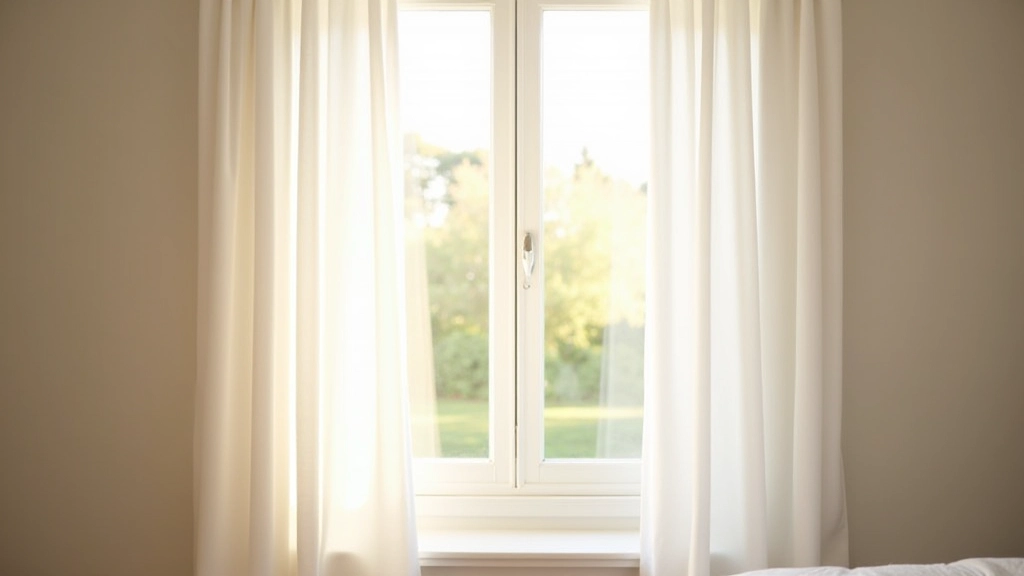
Upgrade Your Curtains
Here's what most people miss — your curtains matter more than you'd think. Thin cotton curtains look nice but they're useless for heat retention. Thermal-lined curtains are a different beast entirely.
A decent thermal lining has a reflective layer that bounces heat back into the room. You'll notice the difference. Rooms feel warmer even when you're not running the heating. And they muffle outside noise, which is a bonus on busy streets.
Go floor-to-ceiling if possible. Don't just hang them at window height — extend them to the floor and let them puddle slightly. This creates a better seal and prevents cold air from sneaking around the edges. Heavy fabrics like velvet or wool-blend work best. They're not light and breezy, but that's exactly the point.
About This Guide
This guide provides general information about draught-proofing techniques and home insulation. Results vary based on your specific home, climate conditions, and how thoroughly you implement these measures. For homes with existing ventilation systems or specific building issues, consult a surveyor or qualified tradesperson before making major modifications. Heating bill savings aren't guaranteed — they depend on your current setup, local weather, and energy usage patterns.
Getting Started This Weekend
Do a Draught Walk-Through
Spend 20 minutes feeling for cold air around your home. Pay special attention to external doors, sash windows, and anywhere pipes enter walls. You'll be surprised what you find.
Pick Up Supplies
Foam weatherstripping tape (about €15), a door sweep (€20-30), expanding foam (€5), and letterbox covers (€10). Total investment under €60. These'll seal most common draught sources.
Start with Doors
Door seals make the biggest difference. Apply foam tape around the frame, then add a threshold seal at the bottom. You'll feel the improvement immediately — literally as you're doing it.
Move to Windows
Same foam tape around window frames. This takes longer than doors because windows have more perimeter, but it's the same simple process. Clean the surface first so the tape sticks properly.
What To Expect
You won't notice massive changes overnight. But after a few days of heating your home, you'll feel it. Rooms stay warm longer. Cold spots near windows and doors disappear. The heating system doesn't work as hard to maintain temperature.
Some people see heating bill reductions of 10-15% from draught-proofing alone. Others notice less. It depends on how severe your draughts were and how thorough you are. But even a 5% reduction pays for the materials in a couple of months.
Plus there's the comfort factor. Your home simply feels warmer and more comfortable. You're not getting that cold breeze from the window. You don't feel air moving under the door. These small improvements add up to a significantly nicer living space.

Keep It Working
Draught-proofing isn't a one-time job. Check your foam tape every couple of years — it degrades from UV exposure and temperature changes. Replacing it's quick and cheap. The same goes for door sweeps and threshold seals.
If you've used expanding foam around pipes, check it occasionally for cracks or gaps. Touch it up if needed. Thermal curtains last longer than foam tape, but they'll eventually fade and lose effectiveness. Plan to replace them every 5-7 years depending on sun exposure.
The real maintenance is noticing when things stop working. If you start feeling a draught again where you sealed it, that's your signal to re-seal. Don't wait until winter — handle it in autumn before you need the heating.
Draught-proofing isn't flashy home improvement work. You won't see it on Instagram. But it's genuinely effective and costs almost nothing compared to other energy-saving upgrades. You'll reduce your heating bill, increase comfort, and actually feel the difference within days.
Start this weekend. Spend an hour finding where your draughts are, then another couple of hours sealing the biggest problems. You'll be surprised how much warmer your home feels by evening.